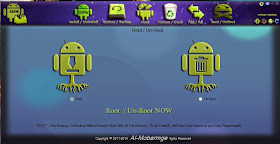
Saturday, 27 August 2016

Increase the Sound of your Android Volume


Hey are your android speaker volume is very low.
Many of us want high speaker volume in android but our android has some shit permissions.
Android Apps: Most of the Android Phones are quite loud and provide a rich audio experience to it users but some Phones are not very loud and this factor annoysmost users especially when you get used to listening music at a high volume.
Here i provide you  a trick , so you remove the limitations of sound on android , and increase the sound of your volume.
 
You can increase the speaker volume yourself, it is very simple.
Here are steps:
 
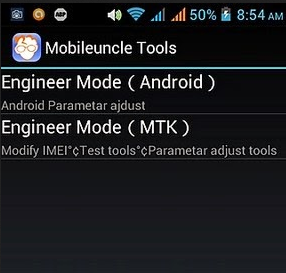
2. Open Mobileuncle MTK Tool and select Engineer Mode
                                                
3. Select Engineer Mode MTK
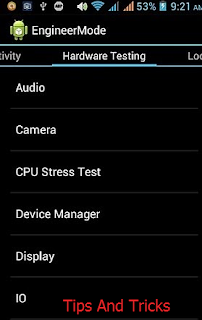
4. Swap to Harware Testing
                                                             
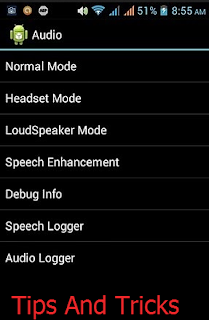
5. Select Audio
                                                             
6. Select Loudspeaker Mode
7. Here you will find Max Volume Value 128, Change this to 145 and press set.
8. You can set this value up to 160 but above 150 is not 

recommended else it may damage your speaker.
9. Now you can close Mobileuncle MTK Tool.
Now you can check the volume of your speaker and feel the difference.
Works with MTK Chipset only
ATTACHED FILES
File Type: apk Mobileuncle Tools_v20130223v2.8.0.apk –  (1.02 MB,)

RELATED ARTICLES:

  1. All type of Android Hacks and Development with Android Device Manager
  2. How To Jailbreak iOS 8.1.2 Using TaiG 2016

  3. Bypass Android Pattern Lockscreen using CMD 2016

  4. Easy Android ROMs Customization Through Xposed Framework

Easy Android ROMs Customization Through Xposed Framework


Besides the usual customization we can do with Android launchers and Android widgets, we also love to try new features that available on custom ROMs. But custom ROMs can be unstable and buggy sometimes and the process to flash over to a new ROM is very time-consuming, especially if you need to restore your backup and app settings.
Through Xposed Framework, by just downloading and installing a ready-made module you can make modification (modules) to any element of the OS or the app itself without the need of flashing a new ROM. For example, if you ever need to skip YouTube ads on your android, download the module for that, install, enable and reboot your device for the effect to take place immediately.
Xposed Framework is getting popular among Android enthusiasts thanks to its easy-to-use interface and added safety which helps you recover easily if it end up soft-bricking your Android device. Also, since Xposed Framework needs to access the Android core system, you need a rooted device for this app to work.

Installing Xposed Framework

Make sure your device is running on Android 4.0.3 or later and you have already enabledUnknown Sources in Settings > Security. You may start by downloading the Xposed Framework app installer here and then install it.
Once installed, open the app and tap on Framework.
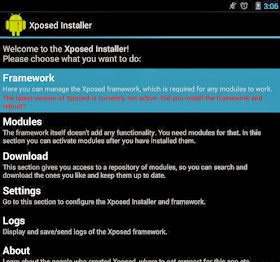
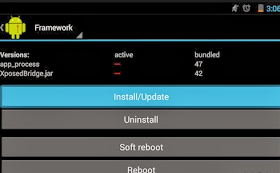
Tap on Install/Update and you will be prompted with a superuser message, grant access to it to begin installing. After that, tap on Reboot to restart your device and you can then begin downloading modules.
Download Modules

Now you are ready to download modules and within the app, there is a download section for you to pick out which features you want on your device. For example, YouTube AdAway, BootManager, Xprivacy. Head over to XDA forums to look for more Xposed Modules.
Choose the module you would like to download, tap on it and then tap on Download. Next, install it.
When you receive the notification to activate the module, in the drop-down notification bar, tick it to enable it.
Reboot your device afterwards for the changes to take effect.

Bootloop? Disable Xposed Framework

If somehow you end up with a bootloop on your Android device, there is a zip file that you can flash to disable Xposed Framework. This zip file is automatically available after you install Xposed Framework on your device and it is located in your device sdcard folder.
In your Android Recovery, locate “Xposed-Disabler-Recovery.zip”, flash it to disable Xposed Framework.

Conclusion

By itself Xposed Framework is just a framework and no files on the device itself are modifiedsince you are using modules to customize your Android device and these modules can be disabled easily. If you want to stay on a stock rom and have custom ROMs functionality, Xposed Framework is your answer.

Must-Have Xposed Modules For Android

Xposed Framework enables all kinds of customization allowing Android users to enhance the look or add features to their device, without touching the original system files or APKs. It uses modules that run on memory. Therefore, any changes made can be removed easily by simply disabling the modules and rebooting. No more flashing ROMs just to get a new feature to work.

There are top 10 must  have Xposed modules are here:

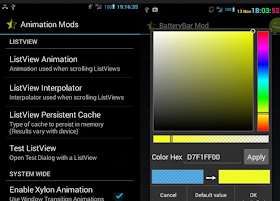
GravityBox. Targeted for Android version 4.1+, this is an all-in-one module that provides a large range of mods.
 
Wanam Kit. Customize your Android 4.4 with features for status bars, sound, lock screen, system, phone, security and more.
 
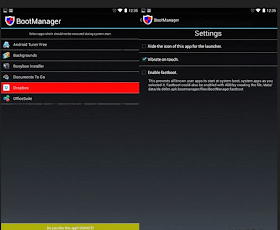
BootManager. Choose the app you want to prevent running upon system startup using BootManager. This will help to reduce slow booting times.
XuiMod. Compilations of features ported from other ROMs packed into one mod.
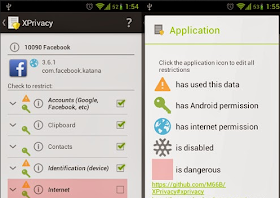
XPrivacy. Restrict access to certain app permissions to prevent leaking of privacy sensitive data.
Android Phone Vibrator. This will allow your Android phone to vibrate whenever a call is connected or disconnected upon calling.
 
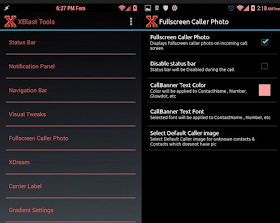
XBlast Tools. Xblast Tools has a huge range of features for you to customize your Android device in any way that you want. The packed user interface lets users apply changes quickly.
Tinted Status Bar. Change status bar color to match the current active app. Can be edited manually too.
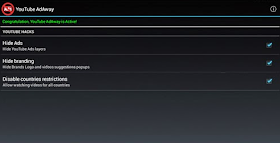
Youtube AdAway. Remove YouTube ads from the official Android YouTube app.
Maximize Widgets on Lockscreen. Expand lockscreen widgets when device unlocked for quick viewing of notifications.
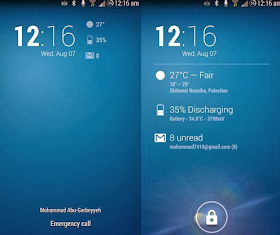
You can download more modules at   Xpose Framework Website 

Related Posts:
  1. Make your URL short In Android with Google URL Shortner 
  2. Top 10 Best Action Games For Android l 2016

  3. How to Get Adsense Account Approved in 2 Days ? [2016]

  4. Best Android Custom ROMs | Best Android ROMs | 2016

Make your URL short In Android with Google URL Shortner


URL shortening

URL shortening is a technique on the World Wide Web in which a Uniform Resource Locator (URL) may be made substantially shorter in length and still direct to the required page. This is achieved by using an HTTP Redirect on a domain name that is short, which links to the web page that has a long URL. For example, the URL “https://fun4fun1.blogspot.nl/2016/08/contact-best-contact-manger-change-your.html” can be shortened to “goo.gl/mGt7UY. This is especially convenient for messaging technologies such as Twitter and Identi.ca which severely limit the number of characters that may be used in a message. Short URLs allow otherwise long web addresses to be referred to in a tweet. 

 Google URL Shortner

Google has long provided the URL shortening service goo.gl. Users are able to log in to the site, paste a long URL and have it shortened by Google. On top of the URL being share friendly, Google would also provide analytics detailing who is actually clicking on the link.


Create a short URL


Create a Shorten URLs in PC


You can shorten URLs to make them easier to share using the Google URL shortener. For example, the short URL goo.gl/mGt7UY takes people to https://fun4fun1.blogspot.nl/2016/08/contact-best-contact-manger-change-your.html

Create a shortened URL

  1. Visit the Google URL shortener site at goo.gl.
  2. If you aren’t signed in, click the Sign in button in the top right corner.
  3. Write or paste your URL in the Paste your long URL here box.
  4. Click Shorten URL.
Below the “Paste your URL here” box, you’ll see the long version of your url and the short version. Once created, your link won’t expire unless it has to be removed for spam, privacy, or legal reasons.


Create a Shorten URLs in Android with App

Month Before, Google Launch his app for url shortner service.The app is free and can be downloaded from the Google Play store here.

The app syncs into your Google account, so you have access to any short URLs you’ve previously created (and you can get analytics on other goo.gl URLs as well). Short URLs can be starred for easy access — and creating new short URLs is as simple as pasting the full resource into the app.

Once you’ve created a new short URL, you can quickly and easily share into any app from your notifications. (Or if you prefer, change the settings to immediately copy the short URL to the clipboard, show a dialog or just do nothing.
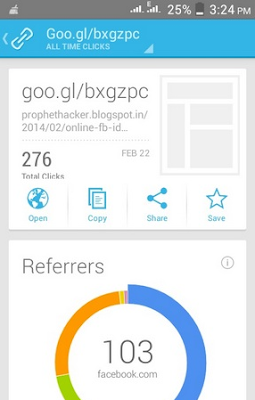
Access analytics of any short URL, including the raw click counts and their distribution across referrers, browsers, platforms, and geographical locations.
The app also lets you
• Shorten URLs and share them quickly
• Access your history – always synced with goo.gl
• Get colorful analytics reports of any short URL, not just yours
• Shorten links through “share” in any app and get rich notifications
• Star your favorites
There are plenty of options for link shortening, with most social networks doing this on your behalf, but by using Google’s service you’re able to see how effective your posts are. And with the Google URL Shortener app installed on your Android device, you’ll no longer have to wait until you sit down at a computer to shorten or check on a link.

How To Save Your Ideas in Google Keep


Google KEEP  is a  memory notes app you can write any type of notes . They are never deleted because they are save on google servers  and your mobile.
Quickly capture what’s on your mind and be reminded at the right place or time. Speak a voice memo on the go and have it automatically transcribed. Grab a photo of a poster, receipt or document and easily find it.
When Ideas come in your mind save it on Google Keep.
When Ideas comes in mind first save it on Google Keep.

What Is Google Keep?P

Simply, Google Keep is a syncing notepad that connects to Google Drive. It also supports photo notes, voice notes, and checklists. We covered it when it launched, but the short version is that Google Keep lets you quickly take and save those notes, photos, voice memos, and checklists to Google Drive, and then access them again on any other web-connected device you use. It’s ideal for quick note-taking on the go, anyone who appreciates simple, fast note-taking tools or to-do apps, or for saving notes on the desktop that you know you’ll need on your Android phone, like shopping lists, addresses, phone numbers, checklists and to-do lists, or conference call codes. Keep even supports Google Apps accounts, so you can use it with your own domain or a business account.
The interface is colorful and easy to use. Those colors are actually organization tools that make it easy to tell your personal notes apart from your work-related ones, or your family-related ones, and so on. Google Keep‘s shallow learning curve, the Android app, the web interface, and the the Google Keep Chrome App all make getting it into your regular workflow easy, regardless of whether you prefer taking notes on the desktop or on your Android phone or tablet. Bottom line? If you’re not using a syncing note-taking app yet, you love Android, and Google Chrome is your default browser, Keep could be the productivity and organizational tool for you. Let’s take a look at some of its best features and how to apply them
Google just made an announcement introducing Keep , its new note-taking service. Keep is currently available for devices running Android 4.0.3 and up, or through the Google Drive Web site. Notes will automatically sync between the Web site and the Android app.
After installing the Android app you’ll be prompted to select the Google account you want to use with Keep. Once that’s done, you can begin keeping notes. There are four different methods you can use to enter a note:
  • A quick note directly from the text box on the initial screen.
  • Add a checklist by tapping on the check mark icon.
  • Create a voice memo by tapping on the microphone. All memos are instantly transcribed, keeping both the audio and text in the note.
  • Add a photo as a note by tapping on the camera.
While viewing a note you’ll be able to assign it a color by tapping on the color palette at the top of the screen. The colors will come in handy when trying to organize your notes, but as it stands now, you have to change the color manually for each note. It would be nice if you could create categories and automatically assign colors based on those categories.
he Google Drive page for Keep is pretty straightforward and mirrors the basic functionality of the Android app. You can add, edit, archive, and delete your notes with just a few clicks.
Related Articles:
  1. Splashtop 2: fast,free, innovative remote desktop for Android

  2. Contact+: Best Contact Manger & Change your default Android Dialer

  3. All type of Android Hacks and Development with Android Device Manager

  4. How To Use Whatsapp Without Phone Number / SIM ?

All type of Android Hacks and Development with Android Device Manager


Android is an amazing and fun platform to work on. Anyone can come up with their own unique idea, create a good product and make it available to thousands and thousands of customers.
Android Development is very easy as operating a computer system .Android developments are not seeing a break anytime soon. If you have a little knowledge about ADB & Fastboot, you may tweak your Android device up to the maximum extent by flashing recoveries, pushing in different commands to perform tasks in the Android ADB & Fastboot command window using your PC. It’s always been a big problem with newbies when they are unable to perform different commands and end up getting failed while they are trying to tweak their Android device. Most of the devices like HTC’s devices, Google Nexus devices, Sony’s Xperia devices and other similar ones need to be treated through ADB & Fastboot at times. 
 There is no need to type the commands again and again and then face different errors. The tool is named as Android Device Manager, that means this tool can manage your device, let you do whatever you want or whatever you could do using the ADB terminal. Moreover, you no longer need to install ADB & Fastboot setup using Android SDK tools and others. Android Device Manager comes pre-loaded with ADB drivers, this small sized tool has almost minimized all the worries and all the hardwork and complexity.
Android is very different from the GNU/Linux operating system because it contains very little of GNU. Indeed, just about the only component in common between Android and GNU/Linux is Linux, the kernel.
The interface is way too user-friendly. Developer  has divided all the commands into different segments. You just got to enable USB debugging mode on your device, connect it, select your tab [the task you want to perform] and wait for the tool to do the job for you. You could never imagine this tough thing getting teared down to such easy method right? Well, that’s what I thought at first and later had to admit the tool’s ease.
How this tool works:
1. Enable USB debugging on your Android device. Get it in Settings > Developer Options > USB Debugging > Check it.                                                 

2. In case you’re unable to find it because you’re running your device on Android 4.2.2 Jelly Bean, you will have to first enable Developer Options. To do so, go to settings > about device > tap build number or 7 times. You will see the developer options in settings now, you can enable USB debugging.
Recommanded Posts:

  1. Top 10 Best Android Apps
  2. 10 Things You Can Do In Android’s Developer Options 
  3. How to Hide Developer Options on Android Device

                                                                                                                                                                              
3. Use OEM data cable to establish connection between your PC and phone, also make sure that your laptop has enough battery charged and your phone is charged enough to perform your desired operations as well. If you’re using a desktop PC, make sure that you’ve proper power supply. 

4.Connect your device to your PC now and allow USB debugging once prompted after connecting it.

5.Open ADM and perform the tasks you want. You may find your desired .img files or desired apks to flash using this tool.
Tips :
One thing you must install a ADB Driver 
Download ADB Drivers from here:ADB Driver


Let’s have a look at the features of Android Device Manager:

Basic Operations:
  • Reboot Bootloader.
  • Reboot Recovery Mode.
  • Reboot Download Mode.
  • Reboot Normally.
Install / Uninstall APKs:
Install or Uninstall Android applications using APK files from your PC. You can delete the applications by applying the package name. Installation is done by selecting the APK file store on your PC.
Restore / Backup:
Restore and Backup your Android device.
Flash
    • Flash Zip Files
    • Flash Recovery (.img) files.
    • Flash Kernel Images.
    • Flash Boot AnimationZip.
Format / Erase:
    • Format or Erase System.
    • Format or Erase Data.
    • Format or Erase Cache.
    • Format or Erase Recovery.
    • Format or Erase Boot Animation.
  • Format or Erase Kernel.
Push/Pull.
Push files into your Android device or pull the files out of it.
Root/Unroot:
Based on Bin4ary’s root method, you can root or unroot the compatible devices in just one click using Android Device Manager tool.
Here are some screen shots:
     
Head towards the Developer’s thread and download this amazing tool on your Windows PC, and buy him a bear if possible. Thanks all!

Related Articles: