Add Multi Colored Popular Post Widget for Blogger | 2016
Add Multi Colored Popular Post Widget 2016 –
Blogger is a one of the mostly used blogging platform by noobs and
bloggers who do event blogging like experiments. Blogger has some of
limitations that’s why the name of blogger come after WordPress (Self
Hosted). But if you are new in blogging you can learn many more things
from blogger like layouts, widgets, HTML/Java Scripts and more. Blogger
allow users to add third party html/java script to to add in their blogs
so there a large numbers of blogger widgets available on internet that
make your blog very attractive and some of gadgets also optimize your
blog speed and improve your SEO.
Now Today we are come to add multi
colored popular post widget to blogger blog that make your blog more
attractive and eager visitors to check your post. The color of the multi
colored popular post widget is very eye catching so, visitor who surf
your site also see in your sidebar and crawl more web page of your site
it can help you to decrease your bounce rate. It is just made of simple
CSS and combination of javascript code that you can add by following
simple steps discussed below.
Steps To Add Multi Colored Popular Post Widget :
First of fall, go to your Blogger dashboard >> Layout >> Add an Element.
- Then you see all widgets that is offered by blogger just choose “Popular Post Widget” from it.
- Before saving it just unselect the option of thumbnail.
- Now the real work is started here. Go to Template Tab >> Edit HTML.
- Now You need to find ]]></b:skin> by pressing CTRL+F and paste this red code in it and hit enter.
- After searching the code ]]></b:skin> you just need to paste the below code above the ]]></b:skin> code.
#PopularPosts1 ul li a:hover{
color:#fff;
text-decoration:none
}
#PopularPosts1 ul li a {
-webkit-text-size-adjust: auto;
-webkit-text-stroke-width: 0px; color: #333333;
display: block;
font-family: Georgia, ‘Times New Roman’, Times, serif;
font-size: 14px;
font-style: normal;
font-variant: normal;
font-weight: normal;
letter-spacing: normal;
line-height: 18px;
margin: 0px 40px 0px 0px;
min-height: 30px; orphans: 2;
padding: 0px;
text-align: -webkit-auto;
text-decoration: bolt !important;
text-indent: 0px;
text-transform: none;
white-space: normal; widows: 2;
word-spacing: 0px;
}
#PopularPosts1 ul li .item-thumbnail{
float:left;
border:0;
margin-right:10px;
background:transparent;
padding:0;
width:51px;
height:51px
}
#PopularPosts1 ul li:first-child:after,
#PopularPosts1 ul li:first-child + li:after,
#PopularPosts1 ul li:first-child + li + li:after,
#PopularPosts1 ul li:first-child + li + li + li:after,
#PopularPosts1 ul li:first-child + li + li + li + li:after,
#PopularPosts1 ul li:first-child + li + li + li + li + li:after,
#PopularPosts1 ul li:first-child + li + li + li + li + li + li:after,
#PopularPosts1 ul li:first-child + li + li + li + li + li + li + li:after,
#PopularPosts1 ul li:first-child + li + li + li + li + li + li + li + li:after,
#PopularPosts1 ul li:first-child + li + li + li + li + li + li + li + li + li:after{
position:absolute;
top:10px;right:5px;
border-radius:50%;
border:2px solid #ccc;
background:#353535;
-webkit-box-shadow:0px 0px 5px #000;
-moz-box-shadow: 0px 0px 5px #000;
width:30px;height:30px;line-height:1em;text-align:center;font-size:28px;color:#fff}
#PopularPosts1 ul li:first-child + li + li + li + li + li + li + li {background:#DF01D7;width:90%}
#PopularPosts1 ul li:first-child + li + li + li + li + li + li + li:after{content:”8″}
#PopularPosts1 ul li:first-child + li + li + li + li + li + li + li +li{background:#B041FF;width:90%}
#PopularPosts1 ul li:first-child + li + li + li + li + li + li + li + li:after{content:”9″}
#PopularPosts1 ul li:first-child + li + li + li + li + li + li + li +li +li{background:#F52887;width:90%}
#PopularPosts1 ul li:first-child + li + li + li + li + li + li + li + li + li:after{content:”10″}
#PopularPosts1 ul li:first-child + li + li + li + li +li{background:#7ee3c7;width:90%}
#PopularPosts1 ul li:first-child + li + li + li + li + li:after{content:”6″}
#PopularPosts1 ul li:first-child + li + li + li + li + li +li{background:#f6993d;width:90%}
#PopularPosts1 ul li:first-child + li + li + li + li + li + li:after{content:”7″}
#PopularPosts1 ul li:first-child + li + li + li + li{background:#33c9f7;width:90%}
#PopularPosts1 ul li:first-child + li + li + li + li:after{content:”5″}
#PopularPosts1 ul li:first-child + li + li + li{background:#c7f25f;width:90%}
#PopularPosts1 ul li:first-child + li + li + li:after{content:”4″}
#PopularPosts1 ul li:first-child + li + li{background:#ffde4c;width:90%}
#PopularPosts1 ul li:first-child + li + li:after{content:”3″}
#PopularPosts1 ul li:first-child + li{background:#ff764c; width:90%}
#PopularPosts1 ul li:first-child + li:after{content:”2″}
#PopularPosts1 ul li:first-child{background:#ff4c54 ;width:90%}
#PopularPosts1 ul li:first-child:after{content:”1″}
#PopularPosts1 ul{margin:0;padding:0px 0;list-style-type:none}
#PopularPosts1 ul li{
position:relative;
margin:6px 0;
border-radius:25px 0px 25px 0px;
border:2px solid #f7f7f7;
-webkit-box-shadow:3px 3px 3px #000;
-moz-box-shadow: 3px 3px 3px #000;
padding:10px
}
After Pasting the code click on “Save template”
and view your blog and see whats changes you made by add multi colored
popular post widget. there are many more widgets that help your blog to
look more attractive and improve your Blogger SEO. If you face any problem regarding this post just leave a comment below.
How To Add Colorful Scroll Bar in Blogger Blog ?
Add Colorful Scroll Bar in Blogger – Its very Latest CSS Style in Blogger To Change Your Scroll Bar Into Colorful Scroll Bar. Now Today am Sharing with You “How To Add Colorful Scroll Bar in Blogger/Blogspot”.
Add Colorful Scroll Bar is very Easy in Blogger. Everybody Wants that
his Blog is Looking Better than Others So they Edited their Blog Default
into very Attractive and Eye Catching Blog. So Guys Lets Start and Make
Your Blog Looking Better. There are lot of Things that you customize in
blogger platform manually so guys if you are interested in more stuffs check here.

Why You Do This ?
Its
Simple that Default Scroll Bar is Very Dull and very Old that is Not
Eye Catching, But when Fill Colors in Scroll Bar so Think when Visitor
Come On Your Website and Scroll Bar Attract the Visitor Eye and Visitor
Said “Humm Nice Customization” So that is Reason You Change Your Default
Scroll Bar.
Steps To Add Colorful Scroll Bar in Blogger :
- Go To Blogger and Login Your Account.
- Click On Template > Edit HTML.
- Now Starts Real Work Press CTRL+F and Find This Code ]]></b:skin> and Paste the Below Code Above This ]]></b:skin> Code & Click on Save Template.
/* Colorful Scroll Bar In Blogger Blog */::-webkit-scrollbar {background:#ffffff;width:12px;}::-webkit-scrollbar-thumb {-webkit-box-shadow: inset 0 0 5px rgba(0, 0, 0, 0.5);background-image: -webkit-linear-gradient(top, #FF0000 6%, #FF0000 29%);}::-webkit-scrollbar-track {}/* Colorful Scroll Bar In Blogger Blog*/
What You Can Do with This Code ?
You can Edit This Code (top, #FF0000 6%, #FF0000 29%) and Change Scroll Bar into Desired Color Red, Green with HTML Color Picker Tool.
You can Also Change Width of Scroll Bar by Edit this Code {background:#ffffff;width:12px;} For Example : (12px, 10px, 8px). and Change Scroll Bar Background Body Color By Replacing #ffffff with your Desired HTML Color Code.
So
Guys Its Really Easy To Do This So If You have any doubts in this post
and Mistake made by me So Please Tell Me or Comment Below To Feedback.
Please Leave Comment Below Post For Feedback Purpose.
How To Add Related Post Widget in Blogger ?
Here Guys, Today We Show that “How To Add Related Post Widget in Blogger”
in Simple Steps. You can Increase your Traffic by using this Blogger
widget. LinkWithin is a type of Widget that is used to show Related
Posts with Thumbnails and Widely used by Bloggers. Now Linkwithin widget
become very common need for every blogger. Because By LinkWithin you
can Increase your Blog Traffic by 30%. When visitor comes to your
website or blog and see below related post. Sometimes Visitor interested
in it and they gonna check it and increase your page views. So Here we
Demonstrate a Simple way to Add Related Post Widget in Blogger. It can make your Blog more attractive and looking like filled Content that User can Caught More content on a Single Webpage.

Linkwith provide
very simple use and installation in your website or blog. Today am show
how to add linkwithin widget in your website step by step instruction.
Steps to Add Related Post Widget in Blogger :
- Go To Linkwithin and
you will see screen like this.

- After this Fill Your Email, Blog URL & Blogging Platform and show stories You can choose 3 or 4 in this screenshot i will choose 5 because it can make your related post more Attractive and get more Visitors Notice your posts.
- If Your blog has in black colour or any other dark colour so check the “My Blog Has Light text on a dark background” Option and Click On Get Widget.
- After Fill the simple form and click on “Get Widget” Button You see Windows Like this.
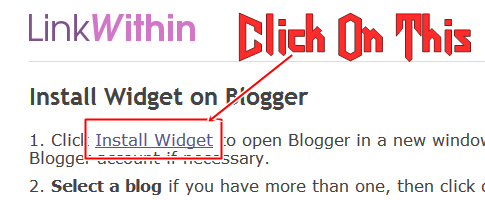
- Click On “Install Widget” after this a new tab is open and show screen like this below :

- In this image Select your blog in which you can install Linkwithin Widget. You also add this code in your blog alternatively. Click on edit content and copy code and add in your HTML/Javascript section.
Conclusion:
LinkWithin
Widget is very Essential Blogger Widget now that Time because every
Blogger want to Place more Content on One Page So, LinkWithin is a Very
Useful to Show Related Post to Get more Traffic. It can Improve Internal
linking of your Site. In other word you can say It is Recommended
Widget for Every Blogger around the Globe.
Add Facebook Popup Like Box Widget in Blogger
Every
Blogger Need Cool Widgets to Make his Blog Classy and Good Looking.
Today We Gonna Show you a New Facebook Popup Like Box Widget for
Blogger. It can Increase your Facebook Like that Help You to Grow Your
Website Via Facebook Traffic. In Today’s Time Socialize your Website
with Facebook is Very Important because It can Improve your Search
Engine Ranking. There are Millions of Active Users on Facebook Who Crawl
Site’s Link. You Only Need to Target your Interest Based Audience. Most
of People Search on Internet About How to Increase Facebook Likes So,
This is the Elite Way to Get Organic and Interest Based Facebook Likes
that help You in Future.
This Facebook Popup Like Box Widget is
very helpful to Attract People to Like Their Page that Come up When they
Load your Website. In Many Way this is Also a Best Strategy to Share
your Website Content on Social Media. Now These Day At Least People
Login Their Facebook Dashboard and Check their New Feeds Daily So, It is
best for Those who have Interest Based Facebook Likes.
How Facebook Popup Like Box Widget Work ?
When User Land on your Webpage and Start Scrolling and Reading your Content and Then a White Facebook Like Popup and Visitor Like your Page because it has Delay Between the Time When the Visitor come to your site and This can help you to Get More Facebook Likes.
Facebook Popup Like Box Widget for Blogger
Facebook Improve their Features and
Algorithm Day by Day to Prevent Fake Facebook Likes So You need to use
Elite Way to Get More and Target Based Facebook Like Because When you
Share any content on your Facebook Page Only those People Click on your
Content Who Really Interested in Others Scroll your Post.
Steps to Add Facebook Popup Like Box Widget in Blogger :
- Login in Your Blogger Account and Select your Blog that You want to Add this Blogger Widget in it.
- Go to Layout and Click on HTML/JavaScript Widget from the List and Pop up Dialog Box Come up Where you Need to Add the Below Code.
- Now Click on Save Button and Its Done.
- Test Your Facebook Popup Like Box Widget. Just Open your Website Page and check it.
Basic Customization Before Adding this Script :
- Replace http://www.facebook.com/HowTricksWorks with your Facebook Page URL that you want to show in Popup.
- Customize your Delay Time .delay(1000) You can Increase and Decrease Delay time 1000 show Popup Box.
- Remove $.cookie(‘popup_user_login’, ‘yes’, { path: ‘/’, expires: 7 }); from Above Code to show this Pop up to Visitor Every time When they Load your Website. By Default Above Code Popup Only One Time when user Visit your Page.
From Editor’s Desk :
Above are the Very Basic and Awesome
Facebook Popup Like Box Widget fro Blogger that Help you to Get More
Facebook Likes in 2015 Because Facebook is Improve their Algorithm to
Filter the Organic Facebook Likes. In Future You need to use Organic way
to Get Facebook Likes So Why Not Start Today. Just Integrate
this Facebook Popup Like Box Widget in Blogger and See the Results.
If You Face any type of Problem with
This Article and the Above Code Just Leave your Problem in Below Comment
We Fix as Soon as Possible. Keep Supporting !
Guys Today I can give you the easiest method that “How to Remove Powered By Blogger Attribution Widget from Blogger/Blogspot ?”. This is not a Difficult Stuff that How to Remove Powered by Blogger Attribution widget
from Blogspot. I seen many bloggers who irritated from this because it
can show the Blogger label that cause blog not Looking Professional So,
Thats why They want to Remove it. One More thing, In Blogger Layout the
“remove” option is disable by default in all blogger templates. But now
in Templates you can Remove this Widget by your Self. Straight to the
point guys : >

How to Remove “Powered By Blogger” Attribution Widget :
- Firstly Open you Blogger Account and Choose that Blog you want to Remove the Attribute Widget.
- Now Go to Template >> HTML In this Section you see “Jump to Widget” Option Click on it and Choose “Attribution1” Widget and it will automatically Point to that Line.
- Now Press CTRL+F and Search for this Below Line
<b:widget id=’Attribution1′ locked=’true’ title=” type=’Attribution’>
- Now Time to remove This. Just Replace ‘true’ with ‘false’ Like we Demonstrate in Above Screenshot.
- After this Your Code is Looking Like : <b:widget id=’Attribution1′ locked=’false’ title=” type=’Attribution’>
- Save Your Template and Go To Blogger Dashboard >> Layout.
- See the Attribute Widget in Layout and Click Edit and Now Remove Option is Appear in Attribute Widget. Simply Click On Remove Button and remove Your “Powered By Blogger” Attribution Widget.


Now Click on View and Preview your Blog. Now you notice that “Powered by Blogger” Attribution is Remove. It is mainly set by Blogger in Default and Disable Remove Permission for this Widget. If this Article is Helpful for you So Please share you Experience Below in Comments.
No comments:
Post a Comment